Microsoft Azure is one of the most popular cloud providers, but its vast range of services can feel overwhelming for developers who are new to the platform. Sifting through the list of cloud offerings is a lot of work. If you are just getting started with Azure, there are a few cloud services you should check out first.
In this Azure developers guide we’ll review the essential Azure cloud services, learn how to best integrate them and walk through a basic application deployment.
Essential Azure cloud services
Azure cloud provides services that range from general-purpose to hyper-niche. While it’s impractical to dive into every offering, there are several that developers should keep an eye on when Azure is their primary computing provider.
Azure Virtual Machines. As the name implies, Azure Virtual Machines are hosted Linux and Windows virtual machines that developers can provision in seconds. These virtual machines are an excellent fit for robust applications that aren’t well-suited to containerization.
Azure Container Instances. Azure Container Instances enable hosting containers in an on-demand capacity. Leave them up forever — or for minutes at a time. Containers provide hosting without the hassle of managing virtual servers.
Azure Functions. If containers require too much overhead for your application needs, Azure Functions is another option. Azure Functions is the platform’s serverless offering for short-lived and stateless workloads. Whether you are supporting large-scale API jobs or simply eliminating idle time for a static website, functions can support your needs.
Azure Storage Accounts. When you need to persist files and data, Azure offers a few different services fit for different data types. Generalized as Azure Storage Accounts, you can store data objects as blobs, file shares, queues, tables and even disks.
Azure Monitor. Aside from deployment and hosting, telemetry is an important tool to have in your tool belt. Azure Monitor is a useful monitoring tool to start with. Azure Monitor allows you to gather intelligence from your entire infrastructure and catch issues before they become major problems.
Azure App Service. While each service is individually useful, Azure App Service gathers them into a more cohesive offering. Developers can use Azure App Services to deploy a full web application, manage authentication and authorization, storage, monitoring and almost countless other features. App Services is an exceptional tool for reducing the cycle time from creation to distribution.
Core Azure developer tools
Beyond the basic application development services, there are also a number of Azure tools to learn when you get started with the provider. There are several different tools developers need to know to interact with and build cloud applications on the platform outside of the primary web interface. The following tools enable more advanced functionality and minimize development challenges.
Azure Command-Line Interface (CLI). The Azure CLI is a command-line interface that works with resources in the Azure ecosystem. With an interface that better enables automation, the Azure CLI is also a useful way to prevent context switching when doing work in a terminal emulator.
Visual Studio Code. Visual Studio Code is a low overhead yet powerful integrated development environment that integrates well with Azure. Less about automation and more about preventing context switching, the Visual Studio Code Azure integration provides a seamless interface for maintaining focus while developing.
Infrastructure as code. Almost every major infrastructure-as-code platform can be made Azure-aware to reduce the overhead of deploying services at scale. Platforms such as Chef, Terraform, Ansible and Puppet can integrate with the platform for automated Azure infrastructure management.
Azure SDKs. If you need more fine-grained control over your cloud application environment, Azure provides developer SDKs to give you total control of your account within the engineering context you need.
Azure application deployment example
As we’ve covered, there are a few different ways to deploy an application on Microsoft Azure, as well as many approaches to it. To demonstrate, let’s go through how to launch a basic web application on Azure App Services with Azure’s standard web interface. The following example provides a step-by-step guide to this Azure application deployment approach.
Step 1. Create a web app
First, navigate to your Azure dashboard. Under the All Services section, create a web app using App Services. This will load a simple setup wizard to launch your application with minimal effort. While most of the form fields should be self-explanatory, pay special attention to the Publish and Operating System sections.
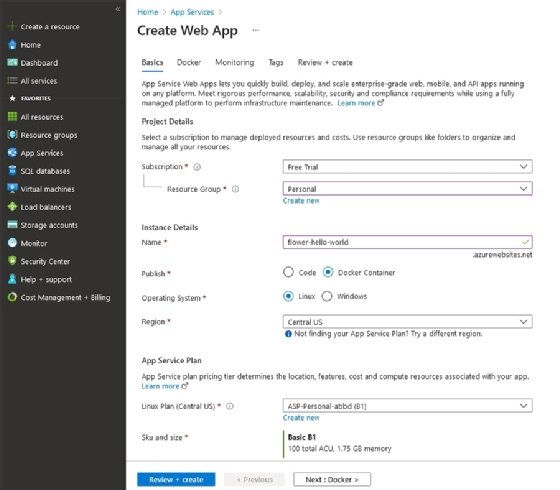
The Publish section determines the type of web application you are launching. In this case, the example shows how to spin up a Docker Container, but you have the option of launching a code-based web application powered by PHP, .Net and a handful of other languages.
The Operating System, on the other hand, determines the environment your application runs on.
Step 2. Configure Docker Container
In the next section, you will be asked to provide some details about your Docker Container, such as where the container comes from and what container you are actually using. To demonstrate this service, I use the tutum/hello-world image, which yields a simple web server and “hello world” page.
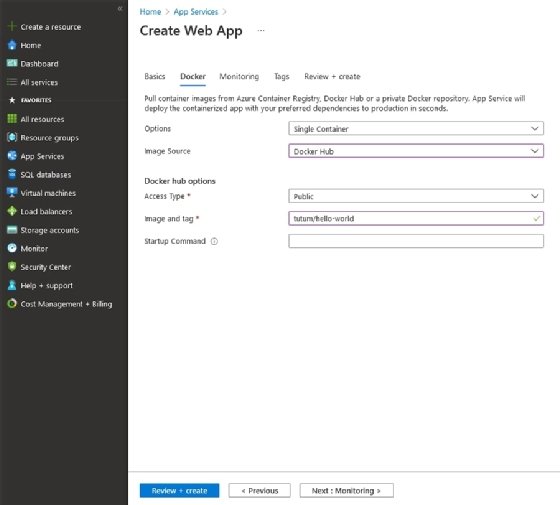
App Services also supports using a full docker-compose configuration. Instead of having to launch and configure interrelated containerized services one-by-one, you can rely on the power of docker-compose to launch them as a set.
Step 3. Ship it
With all the steps in place, you can now review and create your application.
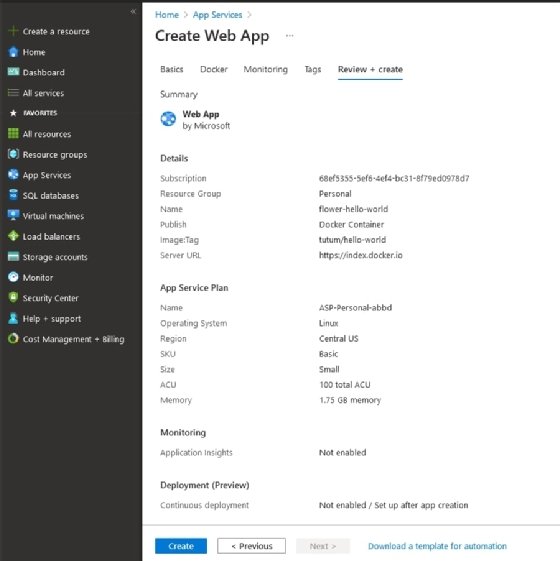
Once you click on the Create button, your Azure App Service will spin up your application according to your specifications. While this can take a little time, depending on the number and size of the containers or code you have selected, you can monitor the progress on the subsequent page.
Step 4. Test
Once your resource is live, you have access to its dashboard. This page tells you anything you want to know about your new web application, from monitoring and statistics to activity and security information.
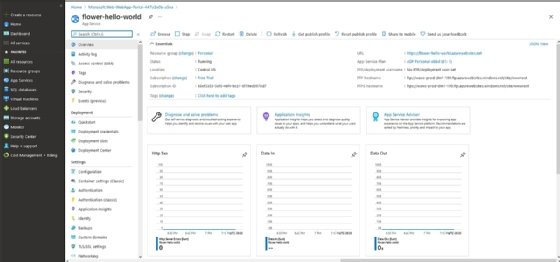
To verify that everything worked as expected, take note of the URL parameter toward the upper-righthand side of the dashboard and click on it. This will open a new browser tab with the Azure subdomain your application is currently hosted at.
Advanced features
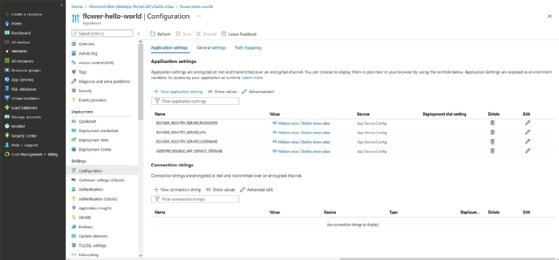
The application we set up is very basic but Azure App Service can handle quite a lot more. While the number of direct integrations is huge, at a high level you can set custom domain names, environment variables, continuous integration and deployment pipelines and in some instances even databases.